 James Williamson
 If you want your turntable setup to sound perfect and increase the lifespan of your stylus and records, then you should never ignore balancing the tonearm.
I know, the term “balance a tonearm” sounds a little complicated, but it’s actually quite easy.
For beginners, it’s just like balancing a seesaw in the middle by managing the weight on each end.
In a seesaw, we need to manage the weight on both ends because the pivot point is in the center. For the tonearm, the pivot point is on the end, so we need to adjust the counterweight settings to make the tonearm parallel to the platter.
Still confused?
Don’t worry. We will discuss everything about the tonearm, its role, technical terms, and how to balance it in simple steps. The idea here is to understand the fundamentals of turntable setup, instead of just following the setup steps.
Let’s get started.
What does a tonearm do? and why balancing it is necessary:
A tonearm (also known as a turntable or record player arm) is one of the crucial parts of a turntable, which directly affects the audio signals generated by the phono cartridge.
Here is the image of the tonearm:
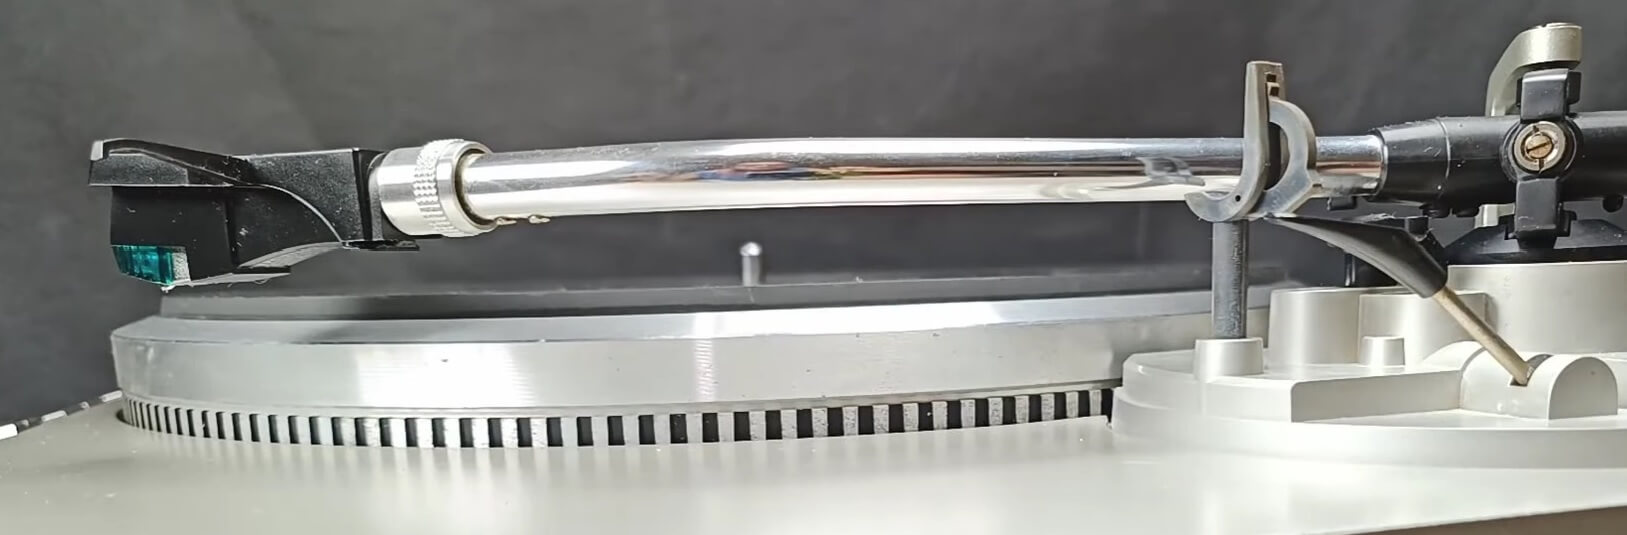
In the image, you can see that the tonearm holds a phono cartridge at one end and is connected to the turntable’s chassis through the other end.
The tonearm plays multiple roles, and for easier understanding, I have explained each role separately.
1) Hold the cartridge over the records.
2) Add the manufacturer-specified cartridge’s tracking force to the cartridge, and help it fetch audio signals from record grooves efficiently.
3) Transfer audio signals generated by the cartridge in response to stylus vibrations to the phono preamp, stereo receiver/amplifier, or speakers through wiring underneath or inside the tonearm.
4) Applying anti-skate to nullify the natural skate force effect.
5) Making the cartridge stable to prevent issues such as record skipping, sound distortion, and low sound from arising.
6) Adds grounding to the whole setup, which helps in eliminating the humming sound from speakers.
These are the crucial roles the tonearm plays in the turntable setup.
You might be surprised how a single component is involved in so many things.
The involvement of the tonearm in multiple things makes balancing a tonearm the first and most crucial setup when setting up a turntable.
How to know if a tonearm is balanced?
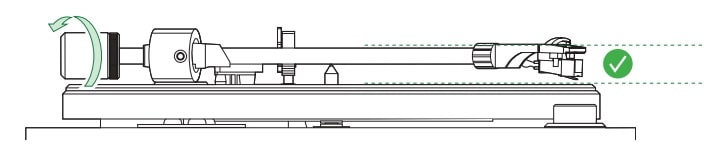
In the above image, you can see that the tonearm is perfectly parallel to the platter, and this is how your tonearm must look after adjustment.
There is one more question that many people ask me- “What happens if the tonearm is not balanced?“.
It’s quite understandable that if a tonearm is not balanced, then it might be either too heavy or too light.
Let’s discuss the answer to both these questions one by one.
What happens if your tonearm is too light?
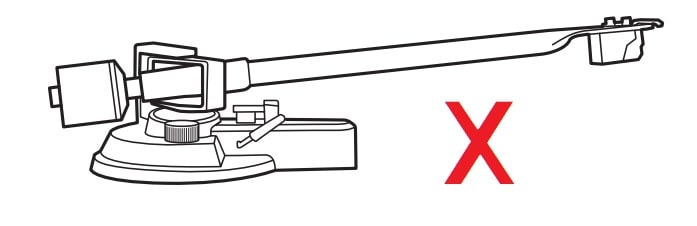
There won’t be enough weight added to the stylus to maintain its position inside the record grooves, which can cause it to jump on the record, causing issues such as record skipping and quiet sound problems.
What happens if your tonearm is too heavy?
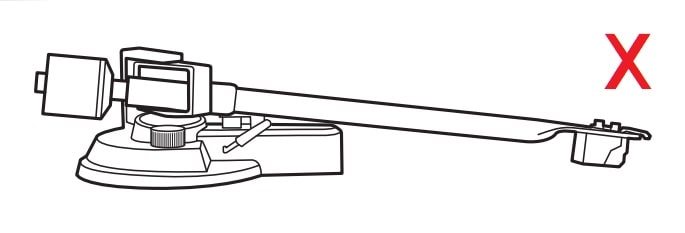
There will be too much weight added to the stylus, which forces it to run deeper inside the record groove.
The heavyweight eliminates the stylus’s ability to move freely, which restricts the stylus from fetching audio signals from record grooves.
This not only affects the sound quality but also causes irreversible damage to your stylus and records.
Till now, you know why it is necessary to adjust the tonearm and what happens if you don’t.
Let’s discuss the technical terms and what sort of tools you might need to adjust the tonearm.
Things you should know & tools you need:
Technical terms:
In the guide, we have discussed three different terms, which are the parts of the tonearm.
Counterweight dial:
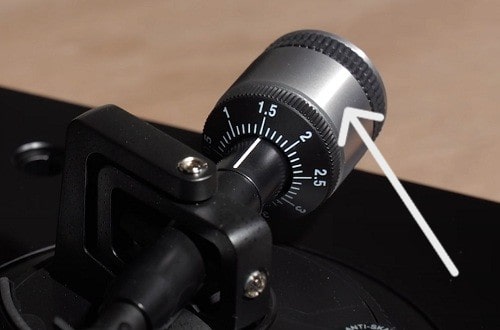
The counterweight dial helps us manage the weight at the tonearm’s end to balance it.
The concept is simple. Rotating it towards the pivot point adds weight to the tonearm, and rotating it away from the pivot point reduces the weight.
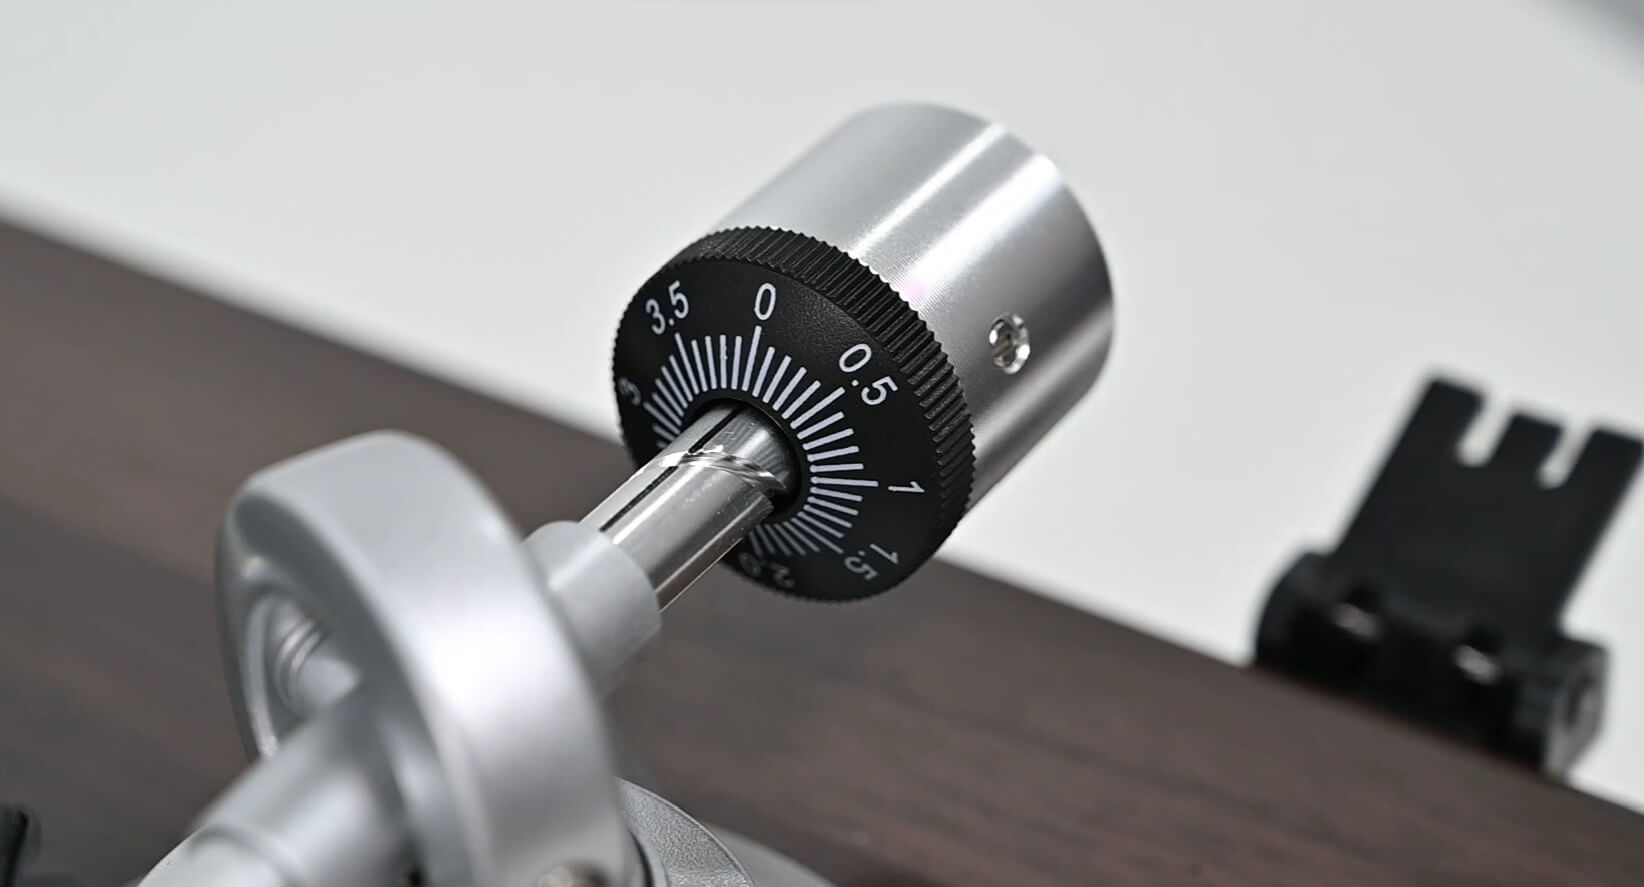
Tracking force dial:
![]()
The tracking force dial adds tracking force to the stylus.
Every cartridge has a recommended tracking force, and after balancing the tonearm, you need to rotate the tracking force dial to match the cartridge’s recommended tracking force, and you’re done.
Although the counterweight/tracking force dial is a single component but I explained them separately because the purpose of both is different.
Anti-skate:

When a stable tonearm is moved from spinning records, a natural skate force forces the tonearm to move towards the spindle.
This natural skate force can cause the stylus to deviate from its expected position, i.e., the center of record grooves towards the spindle, which means it will stay in constant touch with the left channel only.
As a result, the stylus won’t fetch audio signals from the right channel, and the constant touch will increase the scratchy sound and also cause damage to the stylus and grooves.
To encounter this problem, an anti-skate setting was introduced.
This feature puts outward force on the tonearm against natural skate force, which helps the stylus to maintain its position in the center of the groove.
We have explained everything about this concept and why it’s used here: Anti-skating settings. I recommend you read it.
Tools:
The tonearm adjustment is possible without any tool, but for beginners, I recommend getting an acrylic block from Hudson, which will help you with tonearm adjustment and cartridge alignment.
Let’s proceed with the step-by-step guide.
How to Balance the Tonearm Of Your Turntable:
Step 1:
Unplug the turntable or record player from the power source and add a stylus guard to your cartridge.
Step 2:
Set the anti-skating to 0.
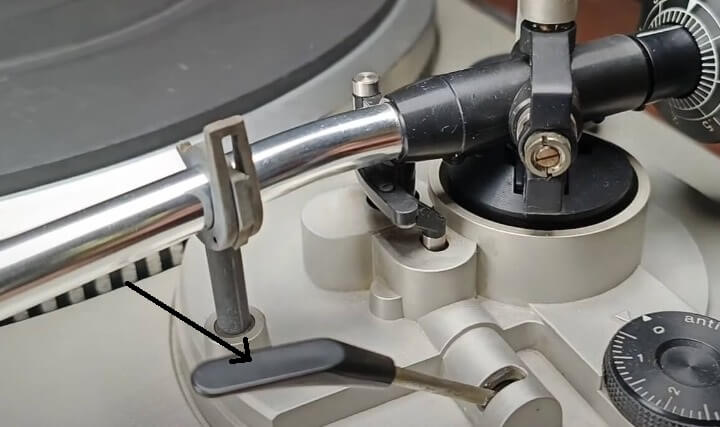
Step 3:
Set the cueing/lift lever in a downward position.
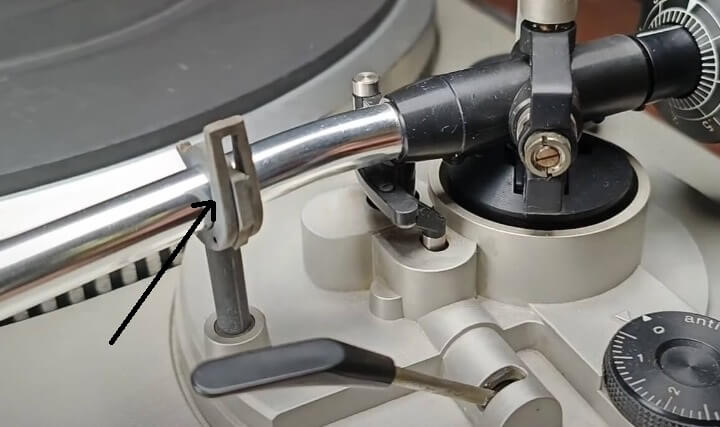
Step 4:
Detach the tonearm from its lock
Step 5:
Gently, move the tonearm over the platter. Once the tonearm starts hovering over the platter, we are ready to make necessary adjustments.
Step 6:
Adjust the counterweight and try levelling the tonearm parallel to the platter. Rotating it towards the pivot point will add weight to the tonearm, and rotating it away from the pivot point reduces the weight.
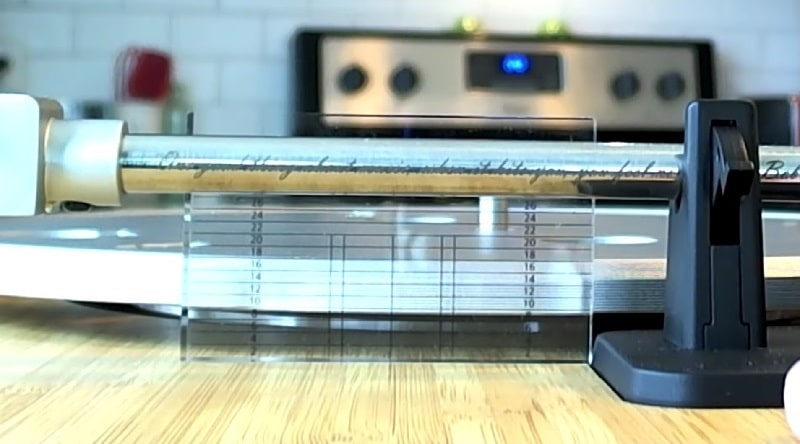
You can also take help from an acrylic block from Hudson Tool. You need to align the tonearm to the straight line shown on the glass.
End Goal:
After adjustments, your tonearm should look as shown in the image below.
Step 7:
Once your tonearm is parallel, hold the counterweight with one hand and rotate the tracking force dial to set it to 0.
Step 8:
Lock the tonearm again on its armrest.
That’s it. Now, you’re ready to proceed with the next setup step- how to align the turntable cartridge.
Frequently Asked Questions:
Q1- How often should I rebalance my tonearm?
Once you balance it, you don’t need to rebalance it again. But you definitely need to rebalance your tonearm again after changing the cartridge.
Q2- How to tell if a tonearm is level?
If your tonearm is perfectly parallel to the platter, as shown in the image below, then you’re done.
Q3- How do I make sure my tonearm is balanced?
Through naked eyes, there can be some alignment issues, so I recommend using an acrylic block from Hudson Tool.
This is a glass block with straight lines.
Place this tool on the plinth, as shown in the image below, and align the arm accordingly.
Q4- How to balance a tonearm without a counterweight?
If there is no counterweight, then your balancing tonearm is already done by the manufacturer. Just plug and play. That’s it.


Perfect guide, loved it. It’s the first time in my life that I’ve perfectly balanced a tonearm to the platter.
Glad to help you!!
Thanks for the Tonearm Balancing forum. Extremely interesting. I did just that tonight with the tonearm on a brand new Technics SL-1200 featuring an Ortofon Preloaded Cartridge/Stylus. Used a small bubble level. Worked Perfectly.
I’m glad to help you!