James Williamson
 Ever wonder how do vinyl records work?
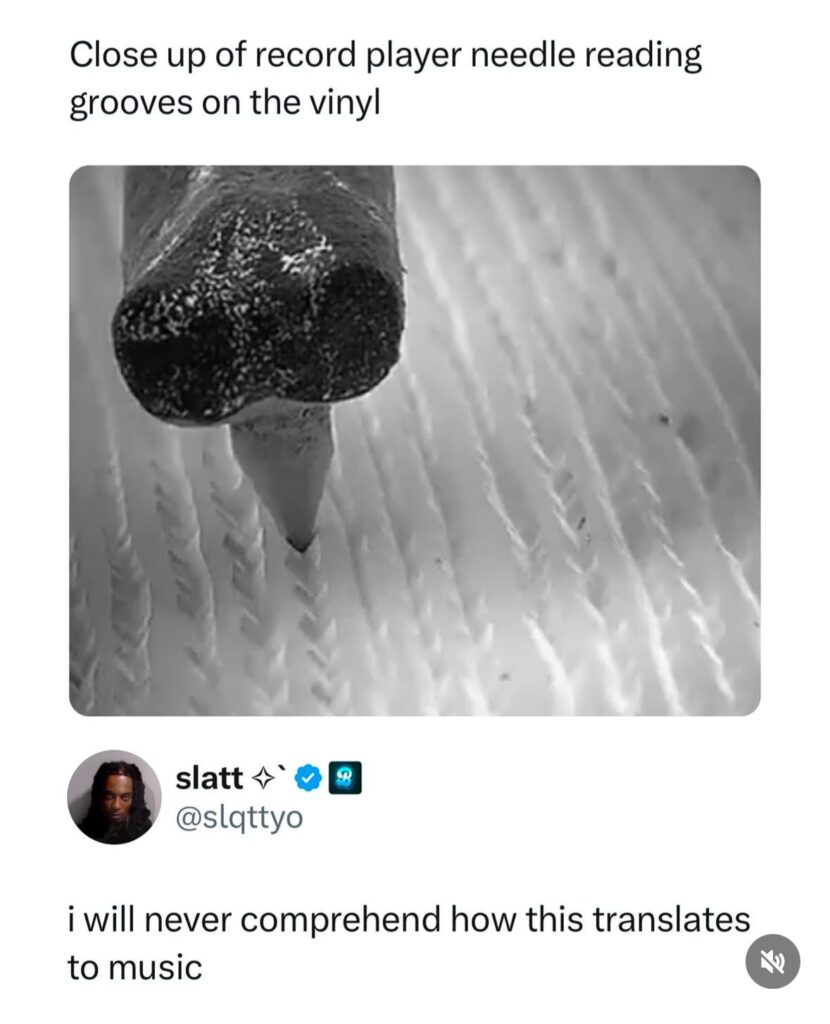
Well, you’re not alone. In my journey, I have met many people who listen to records but don’t know their working concept. Even the meme pages on Instagram often post this meme.
I admit, by just looking at the record and its groove, the whole working concept looks very technical, but in reality, it works on a basic principle of science.
At the start of my career, I always used to think about the working concept of records, and out of curiosity, I asked many people in the vinyl community to help me understand the working concept, to which many tried to explain the science behind it, which I couldn’t understand. At the same time, some of them sarcastically replied, “It’s magic.”.
Well, I might agree with them if I got my Hogwarts acceptance letter or saw Dumbledore cast spells on record players to output music from vinyl records, but sadly, there is no Hogwarts :(.
So, after many failed attempts to understand the concept from other people’s perspectives, I decided to research everything on my own. After a lot of research, I finally understood the science behind it, and to this day, I appreciate Thomas Edison a lot for figuring out everything in the 19th century.
Today, in this article, I have explained the whole concept and science behind the working of vinyl records, shellac records, and wax cylinders in the easiest way possible.
So, let’s get started.
How do vinyl records work?
Well, after a lot of brainstorming to make this complex concept easier to understand, I have decided to break the concept into multiple subheadings through which you can understand everything step by step. Firstly, I am going to share a brief description, but after that, we will talk about everything in detail.
So, let’s start.
Step 1: Recording (Generation of sound waves)
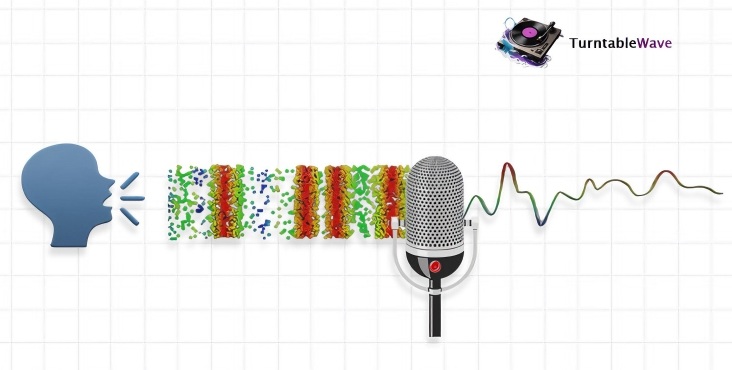
When an artist sings a song or plays any musical instrument in front of microphones, sound waves are generated. These sound waves reach the microphone, and the microphone’s diaphragm converts them into electrical signals, which we can store in digital files.
Step 2: Mix mastering
The sound engineers mix and master the recorded sound and apply the RIAA equalization curve.
Step 3: Cutting and pressing
After the mixing and mastering, we get a digital file containing the mastered electrical signals of a sound wave.
The electrical signals of the song are further transmitted to the disc-cutting lathe’s stylus, and while responding to the transmitted electrical signals, the stylus of the disc-cutting lathe vibrates and engraves the sound waves on the master disc.
These newly engraved sound waves, also known as grooves, are the real representation of the sound waves generated while recording the music.
Once the master disc is ready and tested, the manufacturers start stamping vinyl records.
Step 4: Playback
For easier understanding, I have divided the playback of vinyl records into three parts:
1) Reading sound waves or grooves
![]()
As we have already told you, the record grooves represent the sound waves generated while recording.
Here, the different parts of the record player, i.e., stylus, cartridge, and tonearm, help the turntable in fetching the music information stored in the grooves.
The stylus runs inside the record grooves and fetches the audio information in the form of vibrations. These vibrations are sent to the phono cartridge through a cantilever, and the cartridge converts these vibrations into electrical signals.
These electrical signals are further transmitted to the phono preamp through the tonearm.
2) Pre-amplification and reverse application of the RIAA equalization curve
The electrical signals generated by a cartridge are of low voltage, also known as phono signals. These phono-level signals need amplification to reach line-level signals accepted by stereo receivers or amplifiers.
Here, the phono preamp comes into the picture. A phono preamp amplifies phono-level signals to line level and also applies the reverse application of the RIAA equalization curve.
3) Amplification
Now, the electrical signals are of line level, i.e., 0.316V. The stereo receiver or amplifiers amplify these line-level signals further to make them audible to human ears.
4) Final output through speakers
Here, the amplified electrical signals are converted into sound waves through the speaker’s diaphragm.
The amplified audio signals cause the same vibrations in the speaker’s diaphragm that they caused to the microphone’s diaphragm while recording, which means similar sound waves are recreated, and thus, you start hearing the actual recorded sound.
That’s it. This is the simplest and easiest explanation of how vinyl records play music.
Well, if you are a true vinyl lover, I know your curiosity won’t end with reading the brief description- you still want to understand the working concept at a deeper level.
Right?
Now, we are going to talk about everything in detail. Along with current recording and record manufacturing methods, we will also talk about the methods used in the vintage era.
So, let’s get started.
How does a vinyl record play music (In-depth explanation)
To understand the physics behind a record, you must understand the sound and sound waves and how sound waves travel.
Sound and sound waves:
We all have studied in our schools that sound is a form of vibrations that travel through the air, liquid, and gas. When these vibrations travel through particles in a different medium, a wave is created, which is known as a sound wave or pressure wave.
Using air as a medium, the vibrations hit air particles, which hit further air particles. This chain or wave keeps going until it reaches our ears, microphone, or diaphragm. This chain or wave is known as a sound wave.
Let’s understand the sound waves with the help of a guitar.
Well, air particles are everywhere, and when we play with the guitar string, the string vibrates and creates new particles. These new air particles disturb the existing air particles around the guitar, and the force of the new air particles helps them keep traveling through the existing air particles.
So, when you play the guitar, new and unique sound waves are generated every time.
As you know, there are many instruments played behind the artist’s vocals, and the vibrations from the artist’s vocals and instruments create multiple sound waves at the same time, which get converted into one unique sound wave which makes the playback similar to recording possible.
Recording and groove cutting:
Well, the recording and groove-cutting methods in the current era are different from the vintage era. Even the recording and playback mediums were different in the vintage era.
Before the existence of vinyl records or before the 1940s, we used to have wax cylinders for phonographs and shellac records, also known as 78s, SPs, and gramophone discs for gramophones.
So firstly, we are going to take you back to history, i.e., in the era of phonographs and gramophones.
Wax cylinders & 78s or Shellac records:
Well, the phonograph and gramophone are legendary devices that established the music industry as it is today. Unlike modern-day record players and turntables, phonographs and gramophones work on mechanical energy, and back in the 20th century, their recording and groove-cutting methods were also mechanical.
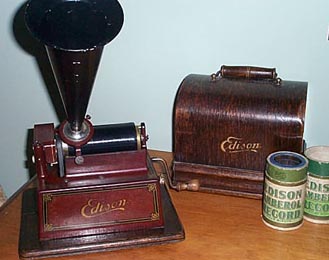
Here is the image of each device for your reference:
Phonograph:
Gramophone:
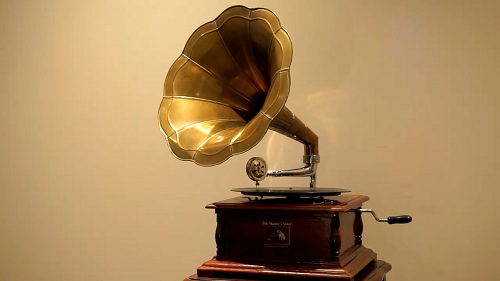
As you can see, both devices have a huge horn that outputs the sound.
Well, many people found a lot of similarities between these devices, but in reality, they have a lot of differences. We also did a gramophone vs phonograph comparison article, and I recommend you read this article and understand these devices more deeply.
Talking about recordings & groove-cutting methods, in the initial days, the technology hadn’t evolved enough to first record the music and then manufacture the discs. So, the records, or wax cylinders, were manufactured at the same time artists were singing.
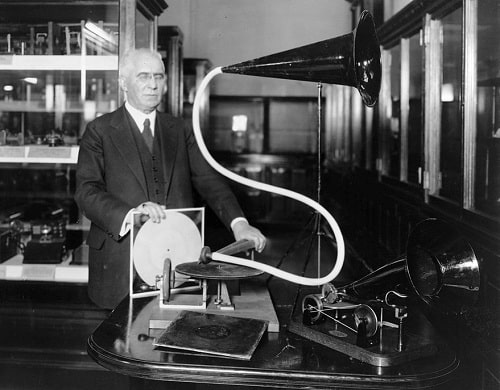
In the above image, you will see a large horn in front of which the artist sings or music is played. The sound waves generated through the music go through the horn and reach the diaphragm. The diaphragm responds to the sound waves and vibrates, which further vibrates the stylus connected to the diaphragm, and the vibrating stylus engraves the sound waves on the record surface, known as grooves.
This is how live music recording was done in the vintage era, and in the above image, Emile Berliner himself is recording the music live on the shellac record.
There is one more cool fact I want to share with you: a phonograph allowed its end users to record their sound or music and listen to it on the same cylinders, which was not possible in the case of gramophone discs.
We also compared these two legendary devices with modern-day record players separately. You can check out phonograph vs record player and gramophone vs record player articles to understand how today era record players are different from these vintage devices.
So, this is about our history, and now, let’s talk about the recording and groove-cutting methods we use nowadays.
Vinyl records
The recording and groove-cutting methods of vinyl records are divided into three steps:
- Recordings
- Mix mastering and RIAA application
- Pressing
Recordings
Recording is the process of capturing sound in a recording medium through microphones. Well, there are two types of recording medium:
Analog recording medium:
Analog recording means that the music is directly recorded in a physical playback medium like magnetic tapes, vinyl records, etc. This medium was the only recording or storage medium in the vintage era of phonographs and gramophones.
Digital recording medium:
Digital recording means that the music is recorded digitally. In this, the sound waves are converted into binary data and saved into different file types, i.e., MP3, WAV, AIFF, and AAC, out of which, as a music producer, I like storing recordings in WAV format.
At this step, an artist goes to a recording studio and records their music. Well, I have also seen people launching albums and EPs recorded through their personal recorders or mobile phone recorders. So, we can say this step has been simplified in the last few years.
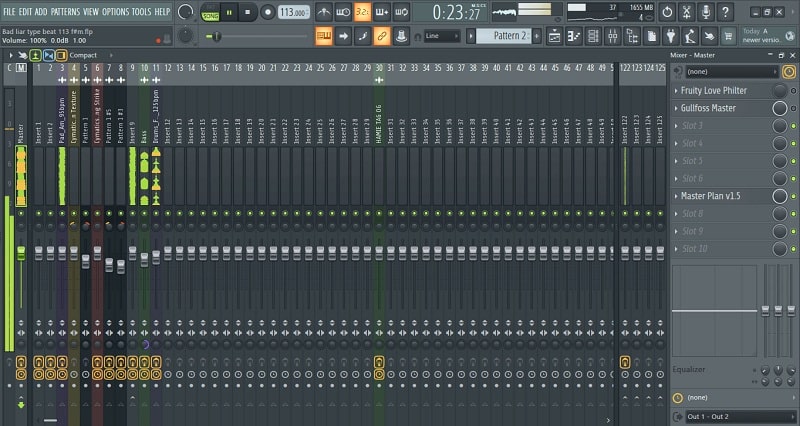
Here, some artists like to have live instruments playing in the background so the whole song and music is recorded at the same time. On the other hand, some artists prefer recording their vocals only, which are further arranged and structured with a music beat by the music producer through DAWs (digital audio workstations) like FL Studio (I use it personally), Logic Pro, and many others.
Mix mastering and RIAA equalization curve application
Mix mastering is one of the most crucial steps after recording that makes sure the soundtrack is well-balanced and compatible with all listening environments, like studio speakers, car speakers, vinyl records, headphones, etc.
When mixing and mastering for vinyl records, sound engineers have to perform an additional step after mixing and mastering the track, i.e., applying the RIAA equalization curve.
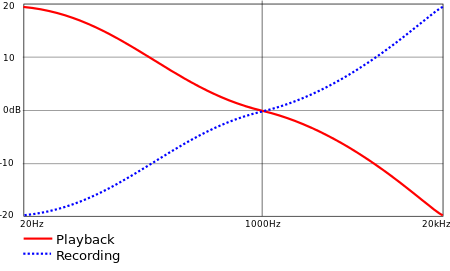
As we all know, we have limited space on vinyl records for recordings, and to increase the recording time and reduce groove damage without messing up with sound quality, the RIAA (Recording Industry Association of America) introduced an equalization standard in the 1950s.
According to this equalization standard, the high frequencies get a 20 dB boost, which takes less groove space, while the low frequencies are suppressed by 20 dB, which takes more groove space. This compression adds more music and sound information in the limited space of a record.
The RIAA equalization curve is the main reason why vinyl records don’t have a flat frequency curve.
Now, you might be wondering, if highs are boosted and lows are suppressed, then how do the speakers output the original recorded sound while playing records? Well, at this point, I will tell you to hold your horses. You will learn about it in the vinyl playback section.
Till this step, the recorded music is still on a digital platform, and now comes the time to engrave the sound waves on a physical recording medium, i.e., a vinyl record.
Groove cutting process
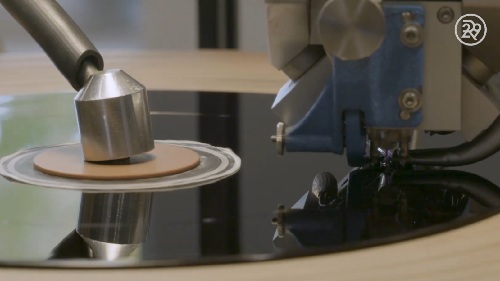
At this step, the sound waves or audio signals are grooved onto a master plate, known as lacquer, through a disc-cutting lathe machine or lacquer-cutting machine.
In this method, the sound waves of the audio track are converted into electrical signals and transmitted to the disc-cutting lathe’s ruby stylus, which further engraves audio signals in the form of grooves on a lacquer-coated aluminum disc.
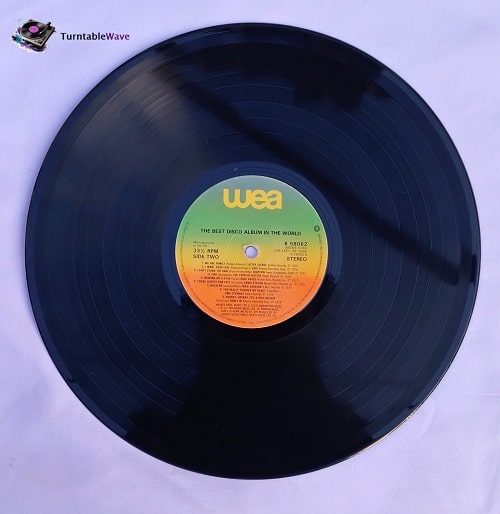
The lacquer disc, or master plate, is a lot bigger in size than vinyl records, which further get trimmed to the selected size of the vinyl record, i.e., either a 12-inch, 10-inch, or 7-inch record.
There are two popular methods used in the groove-cutting process:
- Lacquer mastering
- Direct metal mastering (DMM)
An aluminum disc is used in lacquer mastering, whereas in direct metal mastering (DMM), a copper disc is used.
Till now, we have our master disc created using the audio signals of our recorded track, and now comes the process of manufacturing records.
Pressing
A metal stamper, created from the lacquer disc or master plate, is used to press the vinyl records.
So, this is all about the recording and groove-cutting method. Now, let’s proceed further and talk about playback, i.e., how vinyl records work and produce sound.
Playback:
In simple words, the playback is just the opposite of everything done while manufacturing records, i.e., from recording to mixing and mastering of the music.
Now, we are going to explain how vinyl outputs music while comparing it with its manufacturing process, and this explanation will clear all your doubts and make the vinyl record working concept crystal clear in your mind.
So, let’s start.
For the playback of vinyl records, we either need a record player or a turntable. You can choose either of these two, but here, I will choose the turntable.
Note: I have seen many people who consider record players and turntables as the same device, but in reality, both are very different. So, we did a record player vs turntable comparison article, and I recommend you read the article.
Now, for a better understanding, we have divided the whole playback process into different parts, and this explanation will also help you to understand how a turntable works.
Role of the turntable in the vinyl playback process (Tonearm, cartridge, and stylus)
In the groove-cutting process, we have talked about the disc-cutting lathe, electrical signals, and stylus, which are used to engrave grooves on the records.
Right?
Now, the same concept is repeated here, but in reverse. In the groove-cutting process, we are putting audio signals on the discs, and now, we are going to fetch the audio signals from the engraved grooves.
Confused?
Don’t worry; I will explain everything deeply.
So, the grooves engraved on the master disc in the groove-cutting process are direct replicas of the sound waves of the music recorded on a vinyl record.
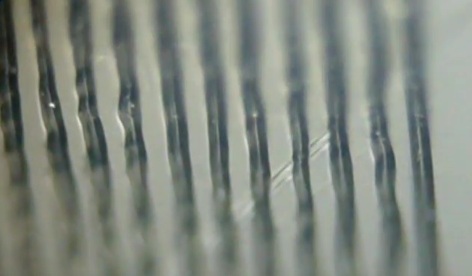
The above-shared image is super zoomed in to record grooves where you can notice the waves. These are sound waves that hold all the music information needed to reproduce the same soundtrack again.
Now, to reproduce the original sound, we need to track these engraved sound waves and fetch the audio signals.
Right?
Here, the turntable parts, i.e., tonearm, cartridge, and stylus, come into the picture.
Let me give you a brief description of these components:
Tonearm:
In simple words, a tonearm holds the cartridge while the stylus is running over the record while maintaining the proper tracking force and anti-skate configurations, along with the wiring that transmits the electrical signals generated by the cartridge further to preamps, amps, and speakers.
Cartridge:
A turntable cartridge is an electromechanical transducer that converts a stylus’s vibrations into electrical signals. You can learn more about turntable phono cartridges here.
In the groove-cutting process, the electrical signals are sent to the stylus, whereas in the playback process, the electrical signals are created from the vibrations caused by the stylus while running inside the record groove or sound waves.
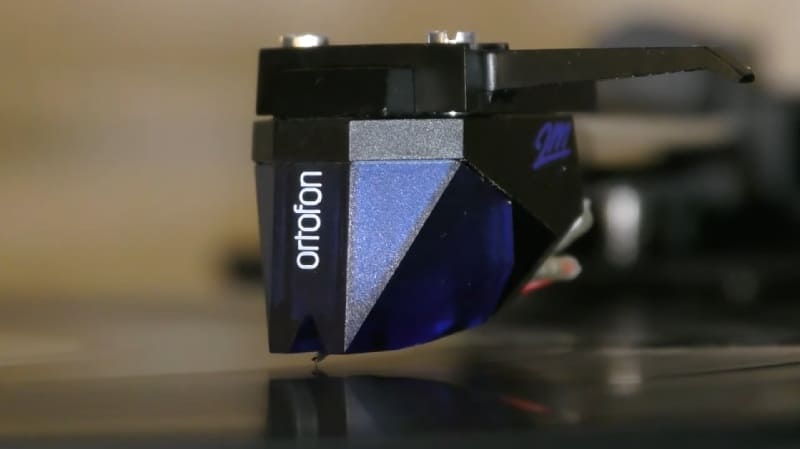
Stylus:
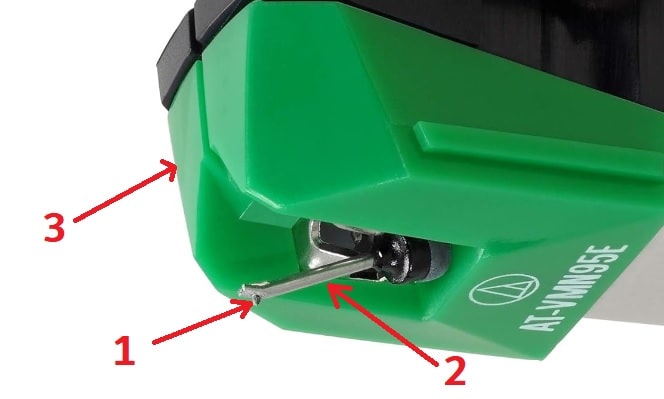
- Stylus
- Cantilever
- Cartridge body
A stylus is a small tip attached to the phono cartridge through a cantilever that runs inside the record grooves and vibrates by following the tracks or sound waves.
Here, the stylus runs inside the record grooves and vibrates. These vibrations are caught by the phono cartridge, which further converts these vibrations into electrical signals. These electrical signals are further transmitted to pre-amps, amps, and speakers through the tonearm.
In simple words, the stylus that fetches sound signals from record grooves vibrates in the same way that the stylus of the disc-cutting lathe moved, which means the same sound wave is generated again.
But the signals generated by the cartridge are known as phono signals, which are of very low voltage, and to make the generated sound wave hearable to human ears, we need to amplify the signals to line-level signals.
To learn about phono and line signals, you can check out this article: phone vs line.
Pre-amplification and reverse application of the RIAA equalization curve
Well, we have talked about the application of the RIAA equalization curve in the mix mastering section above, in which high frequencies get a 20 dB boost while the low frequencies are suppressed by 20 dB to increase recording time and reduce groove damage, and due to this compression, vinyl records don’t have a flat frequency curve.
Right?
Now at the pre-amplification stage, vinyl records get their flat frequency curve back.
At this stage, the phono preamp amplifies the phono level signals (0.003V to 0.006V) to the line level (0.316V) and also applies the reverse application of the RIAA equalization curve, which means that the high frequencies are suppressed by 20 dB and the low frequencies get a 20 dB boost.
After this reverse application, the vinyl records get their flat frequency curve back, and the sound becomes similar to what it was before the RIAA was implemented.
Amplification of sound signals
After the pre-amplification stage, the signals are still at line level, i.e., 0.316V, which further needs more amplification to make them hearable to human ears. So, here stereo receivers or amplifiers amplify the audio signals to make them audible to human ears through speakers.
Speakers and their diaphragm
Before this step, the audio signals were still just electric signals that still needed conversion to output the originally recorded song or audio in the vinyl record.
Here, the diaphragm of the speakers does the magic.
The amplified audio signals cause the same vibrations in the diaphragm that it caused to the microphone’s diaphragm while recording, which means similar sound waves are recreated, and thus, you start hearing the actual recording sound.
That’s it.
I have kept everything beginner-friendly, and I am sure that this is the simplest article on the whole internet to understand how vinyl records work or how music is produced from a physical disc. If you still have questions, feel free to comment below. We will get back to you as soon as possible.